Sensor: VM / Bare Metal
The Telovix Sensor installs as a systemd service on Linux VMs and bare-metal hosts. For Kubernetes deployments see Sensor: Kubernetes (Helm).
::: note The install script requires systemd. If systemctl is not found, the script exits immediately. Use the Helm chart for Kubernetes and containerized environments. :::
Prerequisites
| Check | Required |
|---|---|
| Linux host with systemd | Yes |
| Root access (or sudo) | Yes |
curl installed on the target host | Yes |
Architecture: x86_64 or aarch64 | Yes |
| Kernel 5.4 or newer | Yes |
BTF: /sys/kernel/btf/vmlinux exists | Yes |
BPF filesystem mounted at /sys/fs/bpf | Yes |
Outbound connectivity to Console on port 15483 (Telovix self-hosted default) | Yes |
| Enrollment token from the Console | Yes (15-minute TTL) |
For full kernel requirements and how to verify them see Requirements.
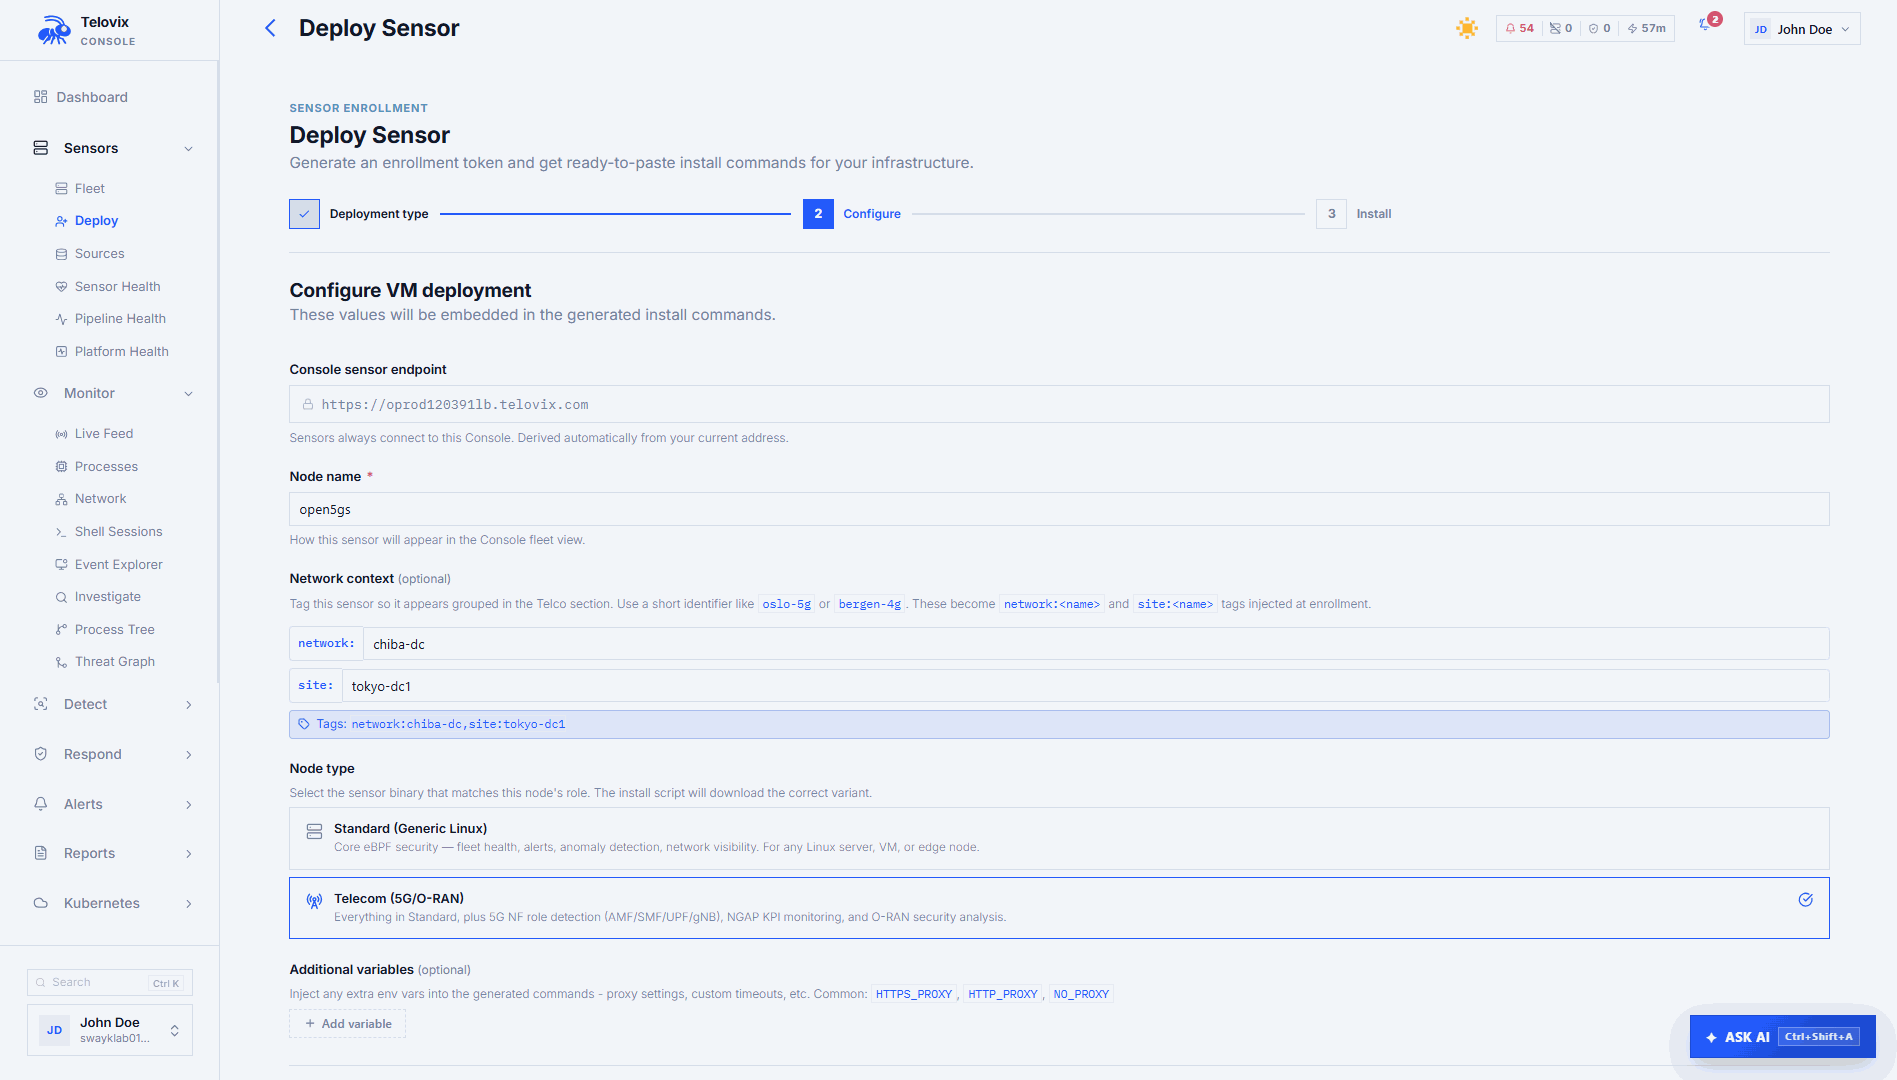
Step 1: Generate an enrollment token
In the Console, go to Sensors and click Deploy Sensor. Select VM / Bare Metal, enter a node name and select a node role. The wizard generates a one-line install command with the token embedded and embeds the correct ?flavor= parameter based on the vertical you configured.
The token is valid for 15 minutes. It is stored as a SHA-256 hash in the Console database. The plain token is only in the generated command and is consumed on first use.
If Deploy Sensor is not visible, the most common cause is an account with viewer or analyst role, which cannot create enrollment tokens; contact your Console admin to assign operator or higher.
Step 2: Run the install script
Copy the command from the wizard and run it as root on the target node. The command includes the enrollment token, node name, role, and flavor pre-filled from the wizard. You can also override the node name, role, and tags directly in the generated command before running it.
If the install script fails immediately after you run the command, the most common cause is the token expiring during copy-paste delay; generate a fresh token from the wizard and run the new command within 15 minutes.
What the install script does
The script runs fully idempotent on a fresh node. If an existing installation is detected, it exits with guidance unless a force-reinstall flag is passed.
- Checks Linux, detects architecture (
x86_64oraarch64), checks for root, checks forcurlandsystemctl. - Downloads the Sensor binary for the detected architecture and flavor to
/usr/local/bin/telovix-sensor. If this step fails, the most common cause is no outbound HTTP/S connectivity from the sensor host to the Console; verifycurl -k https://<console-host>:15483/healthzreturns 200 before retrying. - Attempts to download the Console bootstrap CA certificate. If successful, stores it at
/etc/telovix-sensor/console-ca.cert.pemand records the path in the env file. If the Console uses a public CA (Let's Encrypt or similar), this step is silently skipped and the system CA bundle is used. - Creates
/etc/telovix-sensor/and/var/lib/telovix-sensor/. - Writes
/etc/telovix-sensor/env(mode600) with the Console URL, enrollment token, node role, node name, and optionally the bootstrap CA cert path and tags. - Writes the systemd service unit at
/etc/systemd/system/telovix-sensor.service. - Runs
systemctl daemon-reload,systemctl enable telovix-sensor, andsystemctl start telovix-sensor. If the service fails to start here, the most common cause is a missing BPF filesystem or a kernel too old to support BTF; run the kernel prerequisite checks from Requirements to identify what is missing.
Installed files
| Path | Description |
|---|---|
/usr/local/bin/telovix-sensor | Sensor binary (mode 755) |
/etc/telovix-sensor/env | Environment file (mode 600, root-only) |
/etc/telovix-sensor/console-ca.cert.pem | Console CA certificate (if downloaded) |
/etc/systemd/system/telovix-sensor.service | Systemd unit |
/var/lib/telovix-sensor/ | State directory (certs, policies, event spool) |
Systemd unit
The unit runs as root. eBPF kernel tracing, BPF filesystem access, and memory locking all require full root capabilities.
[Unit]
Description=Telovix Sensor
After=network-online.target
Wants=network-online.target

[Service]
Type=simple
User=root
EnvironmentFile=/etc/telovix-sensor/env
ExecStartPre=-/bin/sh -c "umount /sys/fs/bpf 2>/dev/null; mount -t bpf bpffs /sys/fs/bpf 2>/dev/null || true"
ExecStart=/usr/local/bin/telovix-sensor
Restart=on-failure
RestartSec=15
KillMode=process
TimeoutStopSec=15

[Install]
WantedBy=multi-user.target
The ExecStartPre line remounts the BPF filesystem before startup. This clears stale BPF map pins left by a previous run without affecting any currently-running eBPF programs.
KillMode=process is intentional. It sends SIGTERM only to the sensor process so the sensor can run its graceful shutdown path (notify the engine to stop and remove child processes) before systemd kills the cgroup.
Step 3: Verify the installation
systemctl status telovix-sensorExpected output:
telovix-sensor.service - Telovix Sensor
     Loaded: loaded (/etc/systemd/system/telovix-sensor.service; enabled)
     Active: active (running) since ...
If the service is not active (running), check the logs:
journalctl -u telovix-sensor -n 50 --no-pagerVerify enrollment:
journalctl -u telovix-sensor -n 50 --no-pager | grep -E "enrolled|heartbeat|error"After successful enrollment you should see:
[telovix] enrolled successfully, sensor_id=tlvs_...
[telovix] heartbeat sent
If you see enrollment failed or no output at all, the most common cause is the Console being unreachable from the sensor host on port 15483 (Telovix self-hosted default) or the enrollment token having expired.
The sensor appears in Sensors within one heartbeat cycle (up to 15 seconds after the first successful heartbeat).
Check in the Console:
- Trust state:
healthy - Node role: matches what you set at install time
- Flavor:
standardortelecom - Events: process execution, network connections, and file access events appearing in the Recent Events view
📸 Screenshot: fleet-sensor-healthy Fleet view showing the newly enrolled sensor with trust state healthy, last heartbeat timestamp, node role, and flavor label.
Node roles
The declared role is used by the Console to classify the node for telecom-specific views, NF inventory, and compliance frameworks. For generic_linux nodes on a telecom Console vertical, the Console attempts to auto-detect the role from heartbeat data. Auto-detection can promote generic_linux to telecom_core or telecom_ran based on observed process names and open ports, but never downgrade an already-set telecom role.
| Role | Use for |
|---|---|
generic_linux | Any standard Linux host (default) |
amf | 5G Core Access and Mobility Management Function |
smf | 5G Core Session Management Function |
upf | 5G Core User Plane Function |
pcf | 5G Core Policy Control Function |
nrf | 5G Core Network Repository Function |
ausf | 5G Core Authentication Server Function |
udm | 5G Core Unified Data Management |
udr | 5G Core Unified Data Repository |
nssf | 5G Core Network Slice Selection Function |
scp | 5G Core Service Communication Proxy |
bsf | 5G Core Binding Support Function |
o_du | O-RAN Distributed Unit |
o_ru | O-RAN Radio Unit |
o_cu_cp | O-RAN Central Unit Control Plane |
o_cu_up | O-RAN Central Unit User Plane |
near_rt_ric | O-RAN near-RT RAN Intelligent Controller |
Sensor flavors
| Flavor | When to use |
|---|---|
standard | General-purpose Linux hosts, servers, VMs, edge nodes. Core eBPF security collection. No telecom-specific protocol parsing. |
telecom | Nodes running 5G Core NFs, O-RAN components, or any host where NGAP, GTP-U, PFCP, Diameter, RADIUS, SIP, SCTP, or SBI/HTTP2 traffic is present and should be monitored. |
The flavor is embedded in the download URL by the Console wizard. The standard binary and the telecom binary are separate files with the same install path (/usr/local/bin/telovix-sensor). They cannot be changed after install without running a re-enrollment.
On-disk state
After enrollment, the Sensor stores these files under /var/lib/telovix-sensor:
| Path | Description |
|---|---|
client.key.pem | Active mTLS private key (mode 600) |
client.cert.pem | Active mTLS client certificate |
client.prev.key.pem | Previous key (kept during renewal overlap window) |
client.prev.cert.pem | Previous certificate (kept during renewal overlap window) |
console-ca.cert.pem | Console CA trust anchor |
policy-signing.pub | Ed25519 public key for policy pack signature verification |
sensor-state.json | Enrollment state, sensor ID, trust state, cert expiry |
assigned-pack.json | Current policy pack ID, version, enforcement state |
compiled-policies/ | Active TracingPolicy YAML files |
events.jsonl | On-disk event spool (filled when Console is unreachable) |
engine/v1.7.0/ | Extracted eBPF engine binaries and BPF object files |
The event spool holds up to 100,000 events. When full, the oldest events are discarded. On reconnect, the Sensor drains up to 100 spooled events per heartbeat before resuming normal delivery.
Re-enroll a sensor
Re-enrollment updates the sensor's credentials and binary while preserving its identity in the Console. Use it when:
- The sensor certificate has expired
- You want to update the binary to a new version
- The Console operator has revoked and re-issued credentials
WARNING
Use a re-enrollment token, not a plain enrollment token. A plain enrollment token creates a new sensor record in the Console. A re-enrollment token updates the existing sensor record. Generate one from Sensors > [sensor] > Actions > Generate Re-enrollment Token.
Run the re-enrollment script from the Console wizard, or manually:
sudo bash <(curl -fsSL https://<console-host>:15483/api/v1/sensor/reenroll.sh) \
  --token "<reenrollment-token>"
The re-enrollment script:
- Reads existing node name, role, and tags from
/etc/telovix-sensor/env(preserving them). - Stops the sensor service without calling decommission. The re-enrollment must not remove the sensor record.
- Downloads the latest binary.
- Removes stale identity files (
sensor-state.json,client.*.pem,assigned-pack.json,console-ca.cert.pem). - Downloads the Console CA certificate.
- Writes a fresh
/etc/telovix-sensor/envwith the existing node identity preserved. - Recreates the systemd unit if missing.
- Restarts the sensor, which then re-enrolls using the re-enrollment token and receives a new client certificate.
Uninstall the sensor
The uninstall script is served by the Console and removes the sensor completely, including notifying the Console to remove the sensor record.
sudo bash <(curl -fsSL \
  --cert /var/lib/telovix-sensor/client.cert.pem \
  --key /var/lib/telovix-sensor/client.key.pem \
  --cacert /etc/telovix-sensor/console-ca.cert.pem \
  "https://<console-host>:15483/api/v1/sensor/uninstall.sh")
The uninstall script:
- Notifies the Console to decommission this sensor over mTLS with the sensor's client certificate, retrying up to 5 times with 3-second delays. If the Console cannot be reached after 5 attempts, the uninstall continues anyway with a warning.
- Stops and disables the systemd service.
- Removes
/usr/local/bin/telovix-sensor. - Removes
/etc/systemd/system/telovix-sensor.service. - Removes
/var/lib/telovix-sensor/(all certs, policies, and spool data). - Removes
/etc/telovix-sensor/(env file and CA cert).
After the decommission call succeeds, the sensor record in the Console is permanently deleted. If the Console was unreachable during uninstall, remove the sensor manually from Sensors > [sensor] > Actions > Delete.
Troubleshooting
Install script exits: systemctl not found
The install script requires systemd and exits immediately if systemctl is not available on the host. Use the Helm chart for container and Kubernetes environments where systemd is not present.
Install script exits: architecture not supported
The detected CPU architecture is not x86_64 or aarch64. Only amd64 and arm64 are supported. Verify the host architecture and use a supported node.
Install script exits: Existing installation detected
A previous Sensor installation was found on this host. Re-run the install script with the force-reinstall flag, or use the re-enrollment script to update credentials and binary while preserving the existing sensor record in the Console.
Sensor does not appear in fleet after 60 seconds
Enrollment failed or the first heartbeat is being blocked. Run journalctl -u telovix-sensor -n 50 --no-pager on the sensor host and look for enrollment or connectivity errors.
Sensor shows stale
Heartbeats are not reaching the Console. Verify network connectivity from the sensor host with curl -k https://<console>:15483/healthz. A stale state means the Console has not received a heartbeat within the expected window.
Sensor shows revoked
The sensor identity was revoked by an operator. Generate a re-enrollment token from the Console (not a plain enrollment token, which creates a new record) and use the re-enrollment script to restore the sensor.
Trust state renewal_due
The sensor certificate is within 24 hours of expiry. Certificate renewal happens automatically at the next heartbeat if the Console is reachable. No manual action is needed unless the sensor is also showing connectivity errors.
Events not appearing in Console
ClickHouse is unreachable from the Console host. Events are received by the Console but cannot be written to ClickHouse for display. Check ClickHouse on the Console host: curl -sf http://127.0.0.1:8123/ping.
Sensor starts but eBPF engine fails to load
BTF is missing or the kernel is too old to support the required BPF features. Run the kernel prerequisite checks from Requirements to identify what is missing.
Engine fails on PREEMPT_RT kernel
The PREEMPT_RT kernel disables certain kprobe attachment modes. This is handled automatically; the sensor detects the RT kernel, loads RT-safe policies, and continues. No action is needed; informational log messages about disabled kprobes are expected on RT kernels.