

Alert Inbox and Triage
Open Alerts > Inbox to review fired alerts within your permitted sensor scope. Filter the list, inspect the source evidence, assign ownership, and record a triage decision.
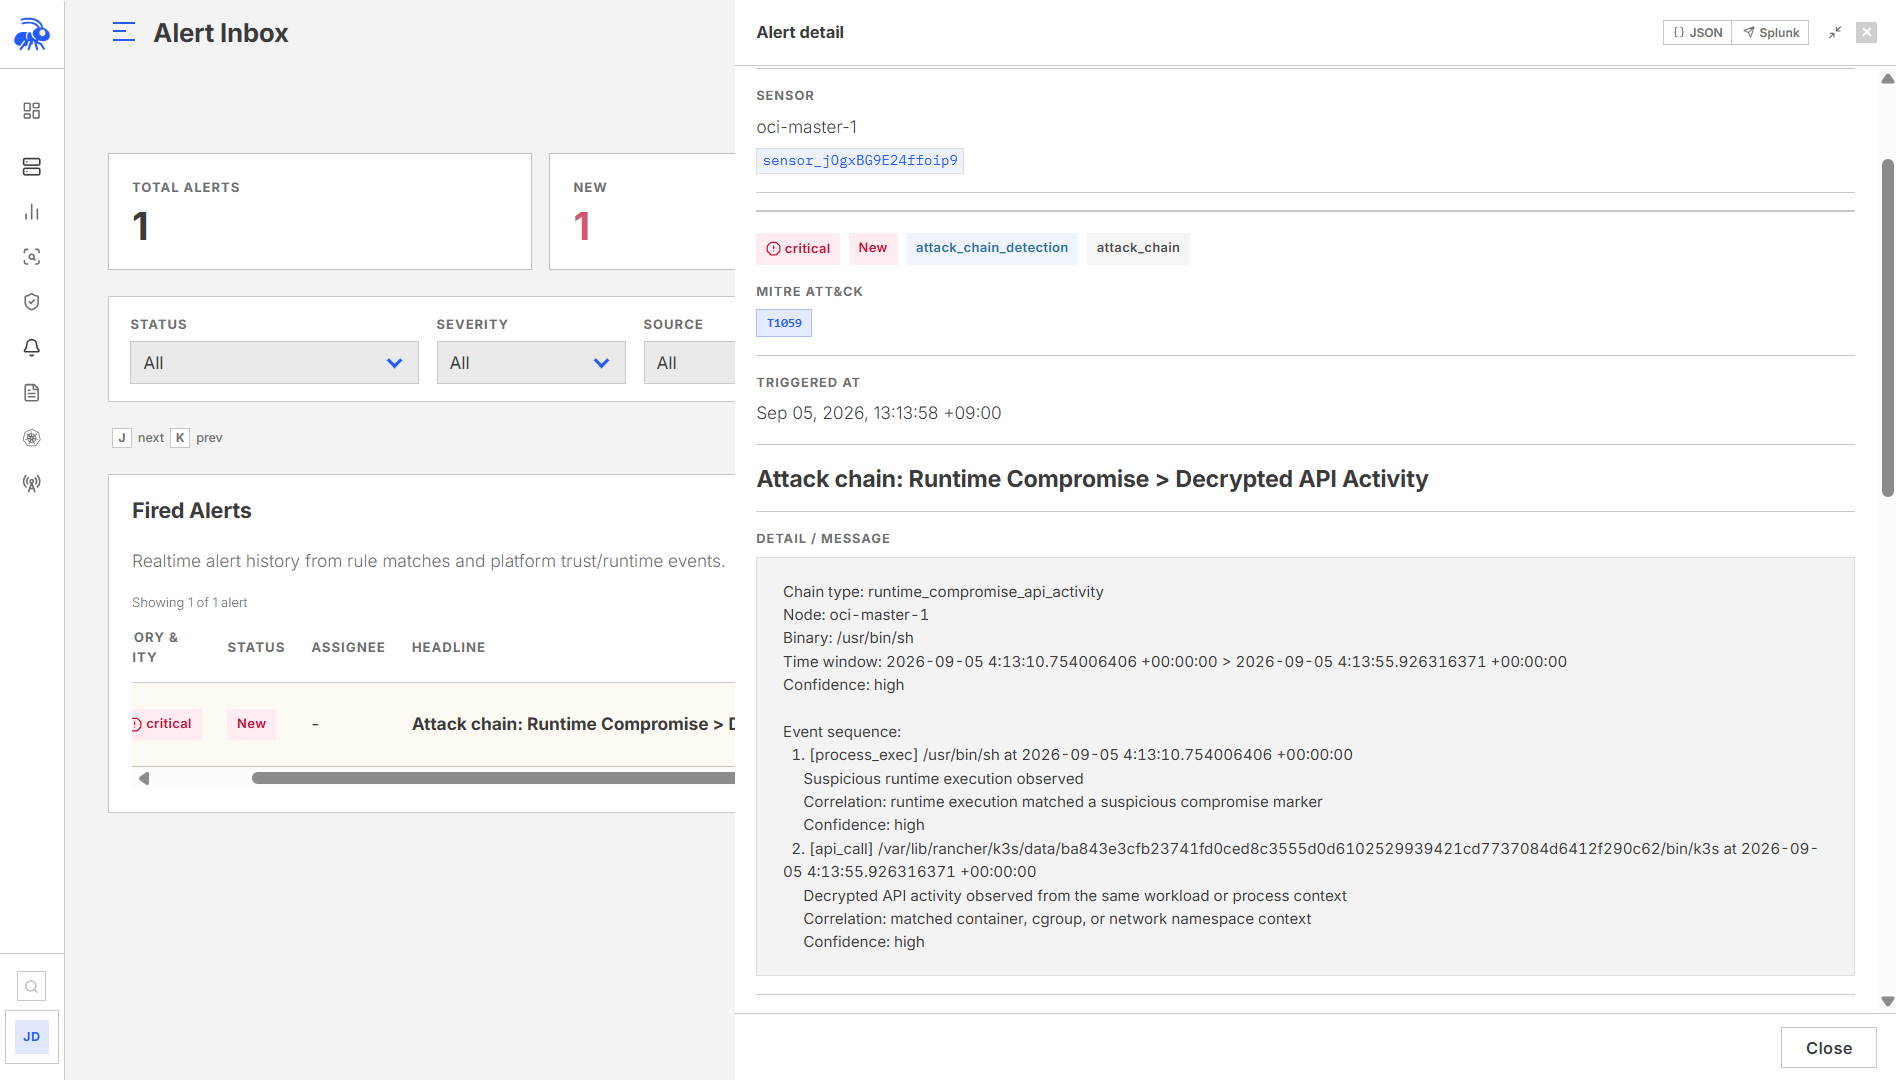
Alert detail tabs
| Tab | Use it to |
|---|---|
| Summary | Review why the alert fired, its severity, affected host, and current decision. |
| Evidence | Inspect the original evidence and open the source attack chain or related events. |
| Activity | Review lifecycle history, manage assignment, and add investigation notes. |
Use the source action, such as View attack chain, for the original finding. Related events opens a broader search in Investigate; it is not the same as the source record. Evidence that has expired or is outside your access cannot be recovered by broadening the link.
Alert status lifecycle
Alerts move through the following statuses:
| Status | Meaning |
|---|---|
| New | The alert has not been reviewed. |
| Acknowledged | A reviewer has accepted the alert for triage. |
| Investigating | The alert is being investigated. |
| Confirmed Threat | A reviewer confirmed threatening activity. |
| Dismissed | A reviewer dismissed the alert. |
| Resolved | An older alert was closed without a specific classification. |
| Suppressed | The alert has been suppressed; review its activity for context. |
Status updates require analyst role or higher.
Reading the alert list
Use status, severity, sensor, and source filters to narrow the inbox. Move between result pages to review additional alerts. A page shows a portion of the filtered list, not the whole fleet's history.
In the Console, navigate to Alerts > Inbox and use the status and severity filters to narrow the list. The navigation badge shows the number of new alerts.
Updating alert status
Requires analyst role.
Open the alert and choose the action appropriate to its current state:
- Acknowledge accepts a new alert for review.
- Start Investigation marks an acknowledged alert as being investigated.
- Confirm Threat records a confirmed threat after review.
- Dismiss closes an alert that does not require threat response.
- Re-open returns a closed alert to the inbox for another review.
Assign an owner and explain the decision in Activity. Marking an alert as investigating does not by itself create a case; use the investigation action to create or link one.
Adding triage notes
Notes are timestamped and attributed to the operator who added them. Maximum 2,000 characters per note.
Requires analyst role.
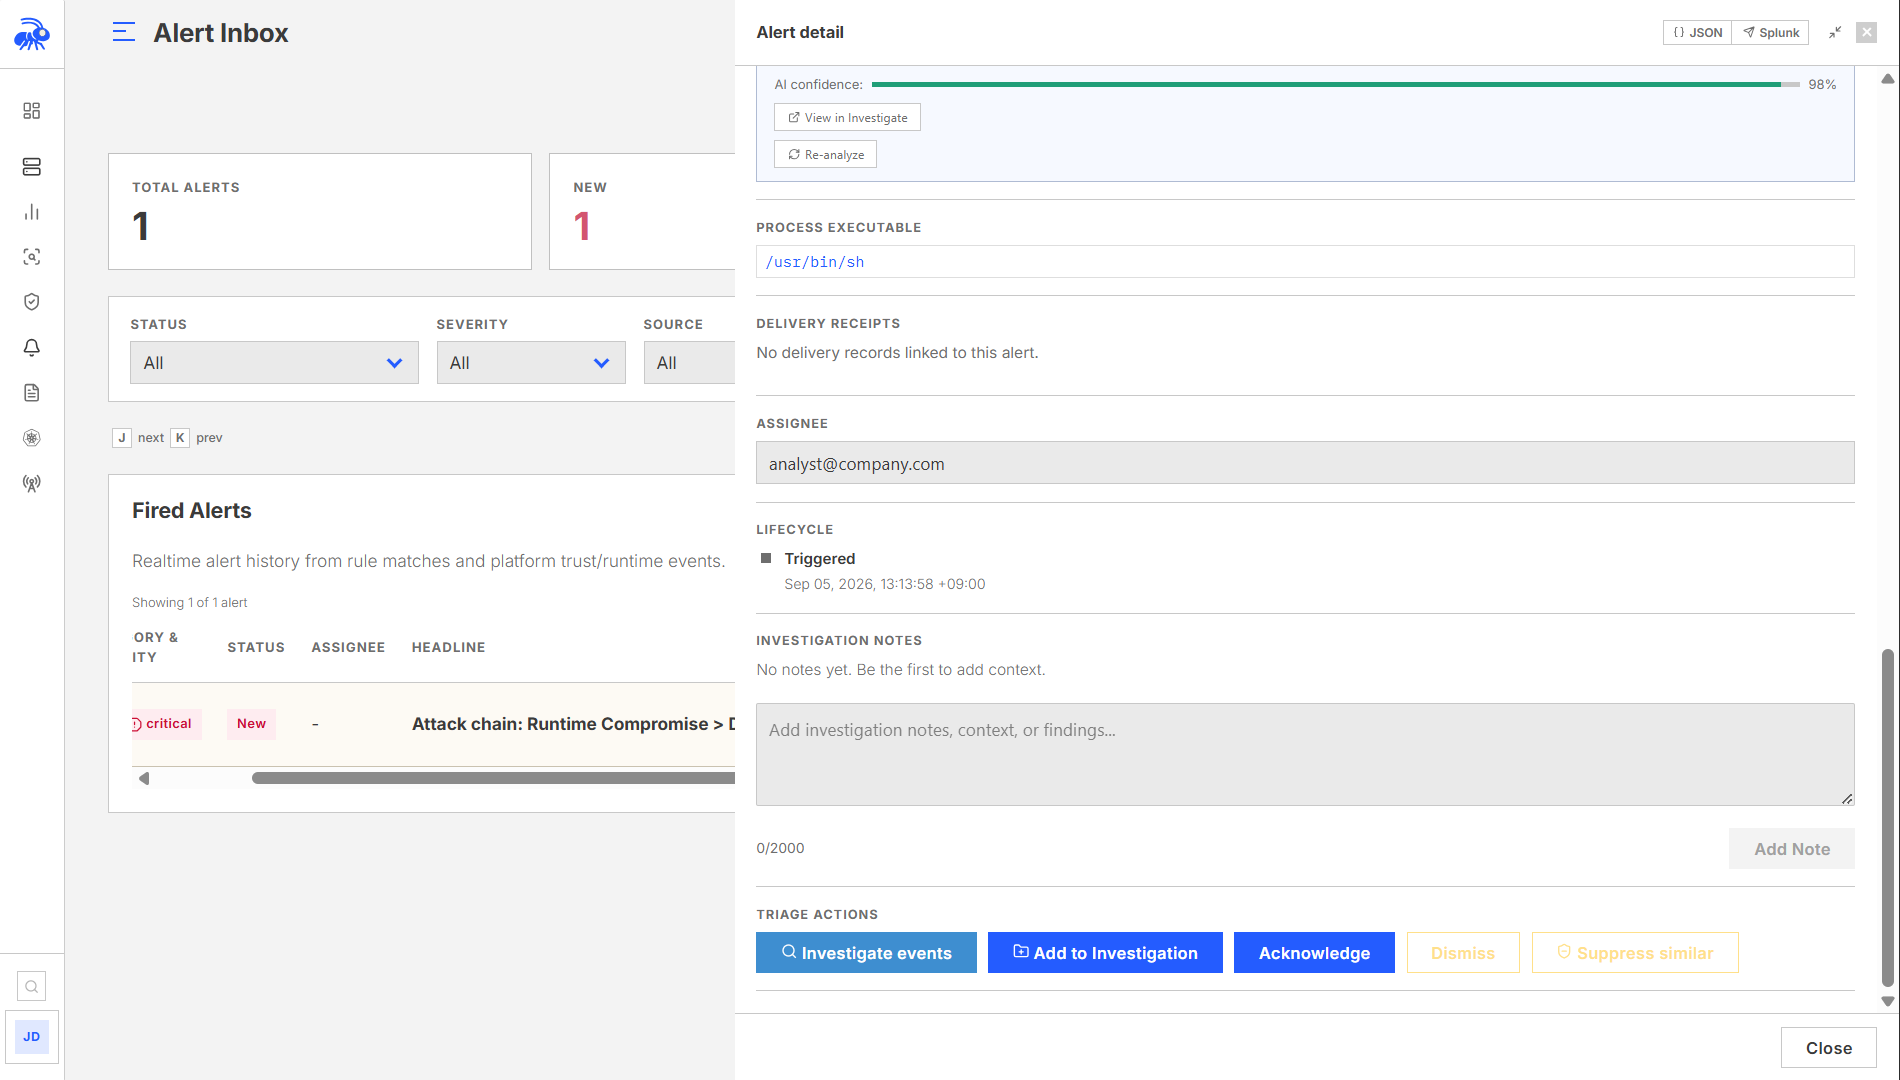
In the Console, open the alert in Alerts. Open Activity and click Add Note, type the note text, and submit. All notes for the alert are listed in the same panel in chronological order.
AI triage
With AI configured, new attack-chain alerts can receive automatic triage. The initial review assesses severity and whether deeper analysis is needed. Deeper analysis runs when escalation is recommended and can provide an explanation, response suggestions, and MITRE ATT&CK context. Automatic triage does not run for every alert source.
To request another review, open the alert and select Re-analyze (requires Operator or Admin access). Configure an AI provider first; the request cannot run without one. Review AI recommendations against the evidence before acting. See AI Assistant.
Export
In Alerts > Inbox, apply the required status and severity filters, then click Export CSV. The export reflects the active filters and is suitable for offline analysis.
Alert rules
Alert rules define when a fired alert is created. Each rule targets a specific event kind and fires when matching events arrive.
Rule types
| Type | Behavior |
|---|---|
standard | Fires once per matching event, subject to the rule's suppression window |
rate | Fires when the count of matching events exceeds match_count_threshold within rate_window_secs |
Rate rule constraints
match_count_threshold: minimum 1rate_window_secs: 30 to 7200 secondsrate_group_by:sensor_id(count per sensor) orprocess_executable(count per binary)
Suppression window
Each rule has a suppression_window_secs field (default 300 seconds) that prevents the same rule from re-firing on the same sensor more frequently than the window allows.
Notification frequency also depends on the delivery settings. Runtime webhook notifications use the rule's interval; email notifications use the destination's interval. Review both rule and destination settings when notifications arrive less often than matching events.
Auto-correlation
When auto_correlate: true is set on a rule, the Console automatically links new fired alerts to an open investigation for the same rule on the same sensor within correlation_window_secs (60 to 86,400 seconds, default 600). If no open investigation exists within the window, a new one is created.
Creating an alert rule
Creating an alert rule requires operator role and at least one configured webhook destination.
In the Console, navigate to Alerts > Alert Rules and click New Rule. Fill in the rule name, event kind, severity, rule type, scope (Sensor, group, namespace, cluster, or workload), MITRE technique and tactic, suppression window, auto-correlation settings, and webhook destinations, then save.
Scope options: choose either a specific sensor or a sensor group, not both. Kubernetes cluster, namespace, and workload filters can further narrow the selected targets.
| Field | Scope |
|---|---|
sensor_id | Specific sensor |
group_id | Sensor group |
k8s_namespace | Events in a Kubernetes namespace |
k8s_cluster_name | Events from a cluster |
workload_name + workload_type | Specific workload |
| (none) | All sensors within your permitted scope |
Alert rule preview
Before saving a new rule, select Preview. The Console estimates triggers from matching events in the last 24 hours and provides a calibration note when applicable. This estimate excludes suppression and delivery intervals. Rate-rule previews do not replay every live evaluation window, so the estimate is not a promised notification count.
Enabling and disabling rules
In the Console, navigate to Alerts > Alert Rules. Each rule row has an Enabled toggle. Use it to enable or disable the rule without deleting it.
Escalating to an investigation
From the alert detail view, operators can create or link an investigation. Investigations allow multi-alert case management with notes, evidence, and ownership.
See Investigations for the full workflow.
Suppression
Use Suppress similar to create an anomaly exception based on the alert's context. Review its scope, pattern, and expiry before saving. This affects matching behavioral anomalies; it does not disable runtime blocking or every source of alerts.
Manage these rules in Detect > Behavioral Analytics > Anomaly Exceptions. Reopening an alert does not delete an exception previously created from it. See Anomaly Exceptions.
Recommended triage workflow
- Filter the inbox to New and Critical to review the most urgent alerts first.
- Open Evidence and follow the source attack chain or event.
- Acknowledge the alert, start investigation, and assign an owner.
- If the activity is expected, choose Dismiss and record why in Activity.
- If the threat is confirmed, choose Confirm Threat, link an investigation, and consider the appropriate response.
::: note Dismissing an alert or creating an exception does not change the underlying activity. Review the detection rule or behavioral baseline when the same pattern recurs. :::